A new well can bring fresh, clean water to your home. But how long do you need to keep flushing before using it?
Here is information on how long should you flush a new well and when to use the surface water.
Reasons To Flush A Well?
If you have a well, it’s essential to understand when and why you should flush it.
Flushing your well helps remove any sediment or debris that may have built up over time and can also help improve the quality and taste of your water for drinking.
Here are some key reasons to flush your well:
- To remove any sediment that may have built up over time
- Flush can improve the quality and taste of your water.
- To maintain the efficiency of your well pump
- It prevents clogging and other issues with your plumbing fixture.
If you are unsure about how to flush your well properly, be sure to consult with a professional.
Flushing your well is essential and can help keep your water supply safe and clean.
Steps To Flush A Well?
- Pumping at a lower rate can help improve the well’s water quality. This is especially important if there are high sediment levels in the bucket of water.
- Try to pump the installer for shorter periods rather than continuously. It will help to avoid drawing sediment into the well.
- If possible, clean the well screen or replace it with a new one. This will help to remove any debris that may be clogging the well.
- Suppose the volume of water is still poor after following these steps. In that case, you may need to have your well professionally cleaned.
Do You Need To Disinfect Your Well Water And How To Do It?
Suppose your well has become contaminated with bacteria. In that case, it is essential to disinfect it as soon as possible.
While boiling water is the most effective way to kill bacteria, it is not always practical. If you cannot boil your buckets of water, use other disinfection methods.
If testing shows that your water depth is contaminated, you’ll need to take steps to disinfect treatment it.
Disinfection processes for your well water include chlorination, ultraviolet light, and ozone treatment.
Which method you use will depend on the contaminant type present and the contamination’s severity.
Chlorinated water is one of the most common methods of disinfecting well water.
It involves adding chlorine bleach to the water depth until the chlorine level is high enough to kill coli bacteria and other contaminants.
Chlorinated water is effective against most types of bacteria but may not be effective against certain viruses.
Ultraviolet light is another common method of disinfecting well water.
It involves passing the water through a particular UV light device that kills coliform bacteria and other contaminants.
Ozone treatment is a less common method of disinfecting well water.
It passes the volume of water through an ozone generator that produces ozone gas.
Ozone gas is effective against most types of bacteria.
Which method you use to disinfect your automatic water systems will depend on the type of contaminant present and the severity of the bacterial contamination.
Contact a professional for advice if you’re unsure which method to use.
Common Causes Of Sand And Sediment In Well Water?
One common cause is a faulty well screen or water softener filter.
If these aren’t working correctly, sand and sediment can enter your water supply.
Another possibility is that there’s simply excessive sediment in the area where your well is located.
This can happen if there’s been a lot of construction or other activity in the area that has disturbed the ground and released sediment and arsenic into the water.
Suppose you’re noticing sand or sediment in your drinking water systems. In that case, a professional must check it out to rule out potential problems with your well.
Once the source of the consistent issue is determined, they can recommend the best way to solve it.
Solutions
One way to deal with sediment is to let it settle before using hot water.
You can do this by letting the water sit in a clean container for some time – anywhere from a few hours to overnight.
The sediment will settle to the bottom of the container, and you can then carefully pour off the clear water from the top.
Another way to deal with sediment is to use a carbon filter.
There are a variety of filters that can be used, including those that attach to your outdoor faucet or those that are portable softener units.
Some filters are designed to be used only once, while others can be cleaned and reused.
If you are concerned about the sediment in your water, you can have it tested. A water test will determine whether or not the deposit poses a health risk.
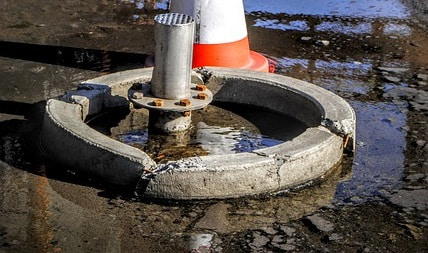
How to Flush Sediment from a Well?
Wells can become clogged with sediment over time, reducing dirty water flow and causing ongoing issues with the submersible pump.
To clear out the sediment, you will need to flush the well. It involves using a high-pressure hose connection to force water down the well and flush the sediment.
1. Start by attaching a high-pressure hose to a water source. The clean garden hose should be long enough to reach the bottom of the well.
2. Open the valve on the faucet with a hose and allow water to flow into the well. The pressure tank from the groundwater will help to dislodge any sediment that has built up over time.
3. Continue flushing until the excellent water from the well is clear.
5. You may need to repeat this process periodically to keep them clear of sediment.
When Can You Drink Water from A New Well?
Before drinking the water, you should generally wait until the well has been operational for at least six months.
It allows time for any bacteria or other contaminants in the domestic drinking water supply to dissipate.
If you are concerned about the safety of your well water, you need to test it with a certified lab.
How to Flush a Borehole?
1. Start by turning off the electric power outages to the borehole.
2. Open the flush valve controlling water flow into the borehole.
3. Allow all the water to drain out of the borehole, which may take some time, so be patient.
4. Once the tap water has drained, close the ball valve and turn the power back on.
5. Finally, run some clean water through the borehole to flush out any debris that may have been left behind.
How Long Should Your Pressure Test Pipe Work?
The answer to this question depends on several factors, including the type of piping being tested, the testing method used, and the desired test pressure.
However, most pressure tests should be conducted at least 15 minutes at the desired test pressure.
It will ensure any leaks are detected and repaired before servicing the piping.
Some types of plastic piping may require a more extended test time due to the material’s inherent properties.
In addition, very high-pressure tests may need to be conducted for a shorter period to avoid damaging the piping.
Consult with your piping manufacturer or testing professional to determine the appropriate test duration for your particular piping system.
Further cleaning tips are explained in this video:
Conclusion
In conclusion, you know that the success or failure of a well can depend on how long should you flush a new well.
If you do not flush your new well long enough, you could have difficulty getting water later. If you flush it for too long, you could waste water and money.
Finding a happy medium that will work best for your situation is key.
Flushing your new well is essential in ensuring you have access to clean, safe water for years.
You can help ensure that your well will provide you with many years of trouble-free service by correctly flushing your well.
We hope this article helped give you the information you need to decide about flushing your new well.


